
Importing your contact list into CampaignLark allows you to quickly start sending campaigns and building automations with your existing subscribers.
Navigating to Contacts
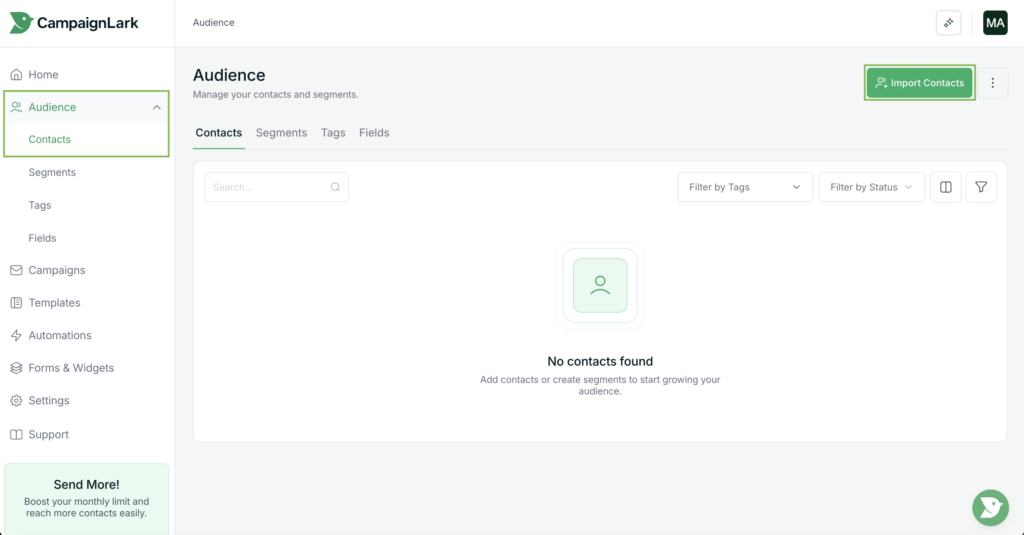
Inside your workspace, navigate to the Audience dropdown in the left sidebar navigation menu.
Click Audience and then select Contacts from the dropdown.
This will open your contacts dashboard where all subscriber information is stored and managed. If you have already imported contacts, they will appear here with their relevant details.
If your contact list is empty, you can begin importing your contacts by clicking the Import Contacts button located in the top-right corner of the screen.
Choosing an Import Method
After clicking Import Contacts, you will be prompted with two import options:
CSV Upload – Upload a CSV file containing your contacts.
Copy N Paste – Paste your contacts directly into the system.
For this guide, we will use the CSV upload method.
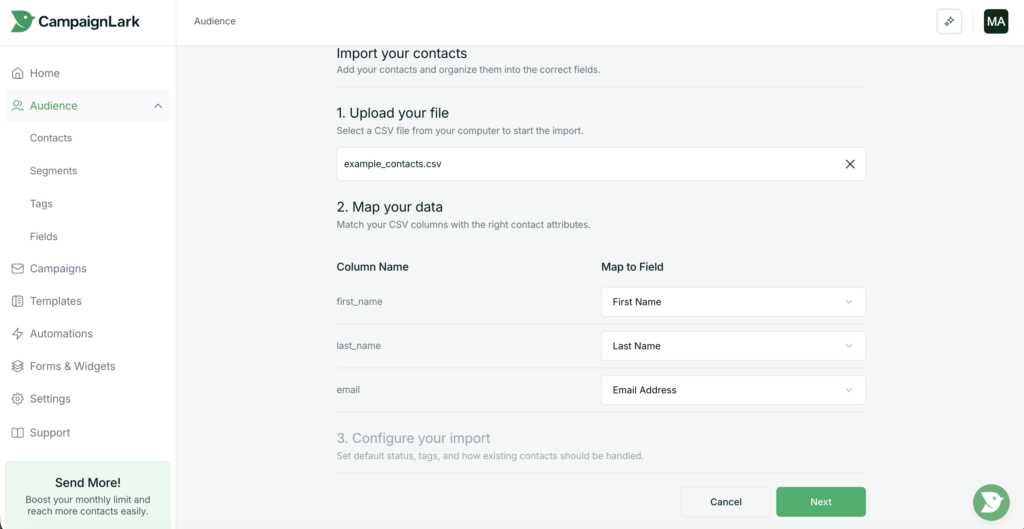
Uploading Your CSV File
Upload your CSV file by dragging and dropping it into the upload box provided.
Once the file is uploaded, CampaignLark will analyse the data and prompt you to map the fields found inside the file.
The system will attempt to auto-detect common fields such as:
Email addresses
First names
Last names
This helps speed up the process and reduces manual setup.
If your CSV contains additional data, you can create custom fields to store that information according to how you want to organise your contacts.
Configuring Your Import
Once you are satisfied with the data mapping, proceed to the configuration step.
Here you can define additional settings for the imported contacts, such as:
Tags
Subscriber status
Overwrite – This means that if you had an existing list and in this import another user is duplicated it will update that user or not with the appropriate details & status
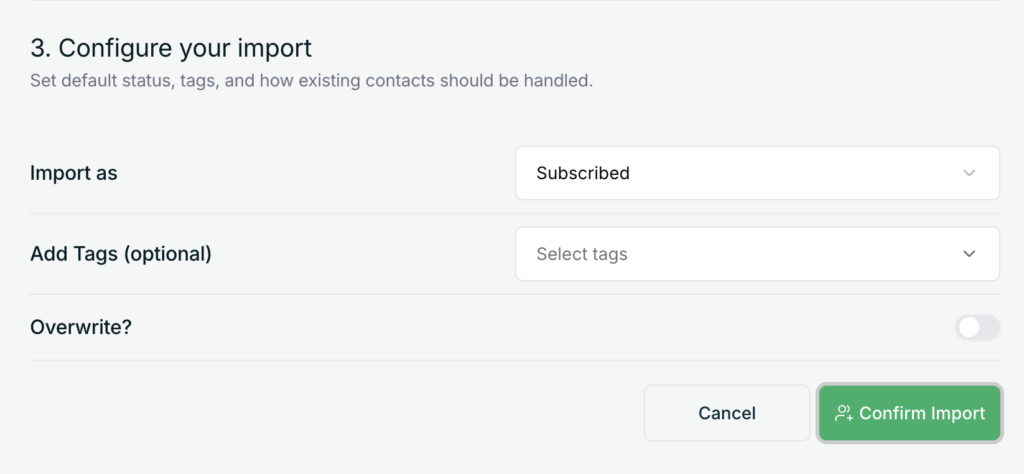
These settings can help you organise your contacts immediately, or you can choose to configure them later if preferred.
Completing the Import
Click Import to begin the import process.
Depending on the number of contacts in your file, this may take a few seconds or several minutes.
Once the import is completed, you will receive an email notification confirming the successful transfer.
Returning to your Audience → Contacts dashboard will then display your newly imported contacts ready for use in campaigns and automations.