
Every workspace in CampaignLark includes a customizable confirmation page.
This page is typically shown to recipients after they complete an action such as subscribing through a form, updating their preferences, or confirming their subscription.
You can customize this page to match your brand, messaging, and design style.
Navigating to the Page Editor
To access your confirmation page, navigate to Settings using the left sidebar navigation menu inside your workspace.
Once inside Settings, click on the Pages tab.
Within this section, you will see several system pages that can be customized.
Locate the Confirmation Page and click Edit.
Customizing the Page
Clicking Edit will open the page editor, where you can modify the layout and content of the confirmation page.
Inside the editor, you can customize elements such as:
Headers
Paragraph text
Icons
Buttons
Page styling
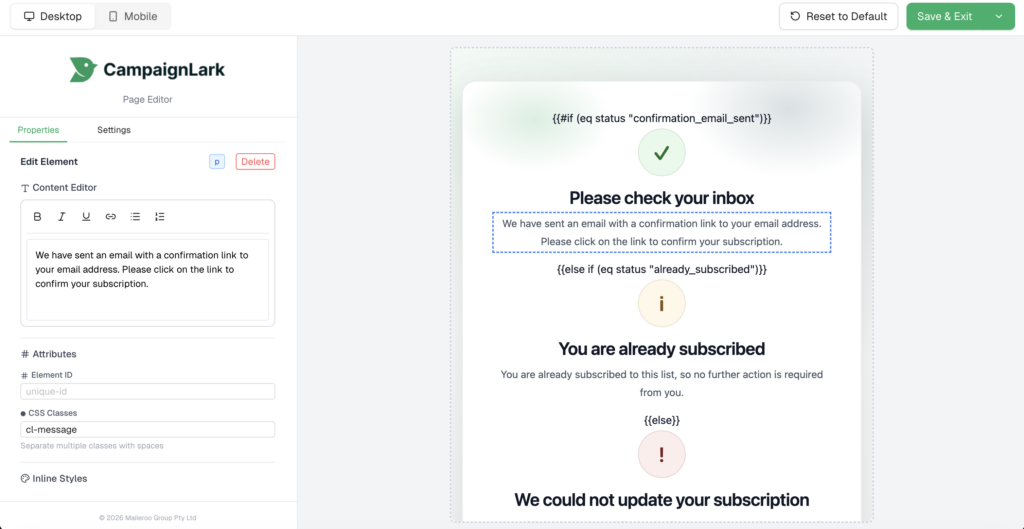
Simply click on any element to update its text, adjust the styling, or modify how it appears to your recipients.
This allows you to tailor the confirmation experience to better reflect your brand voice and visual identity.
Understanding Conditional Elements
You may notice elements that contain double curly brackets such as {{ }}.
These are used for conditional rendering, meaning certain content may appear depending on the action the recipient has taken.
If you are unfamiliar with how these work, it is recommended not to modify them, as they control important functionality on the page.
You can still safely customize surrounding elements such as text, layout, and styling without affecting the underlying logic.