
Signup forms let you collect subscribers directly from your website or landing page. When someone submits a form, they are added as a contact in your workspace. You can embed forms on any page of your site, assign tags to new subscribers, and control how the form looks to match your brand.
Creating a Form
Navigate to Forms & Widgets in the left sidebar.
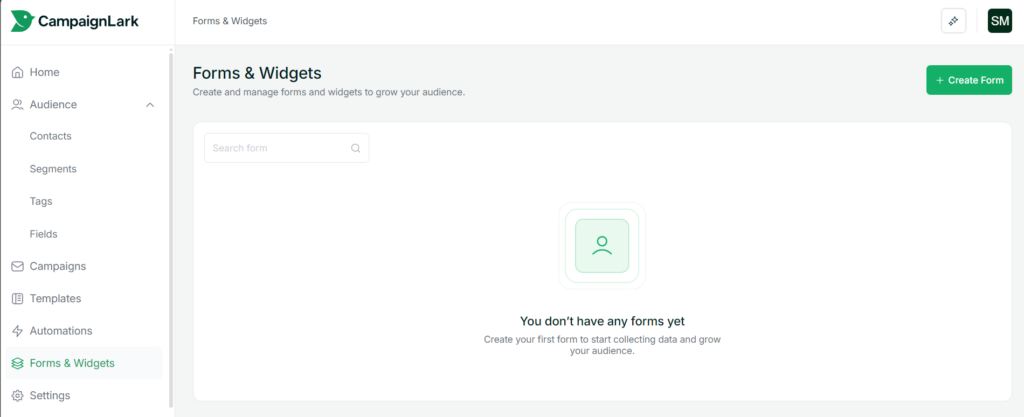
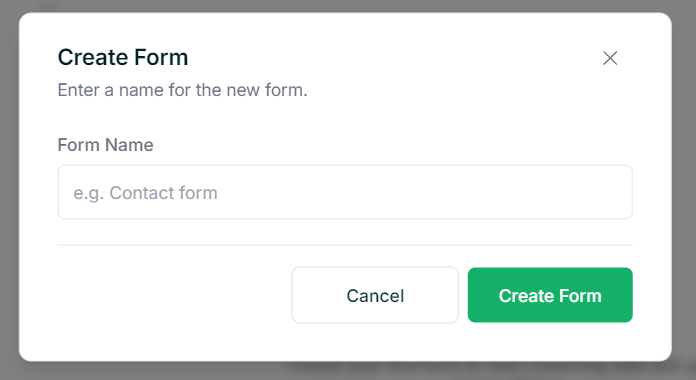
Click Create Form. Enter a name for your form and confirm.
This opens the form editor. The right side shows a live preview that updates as you make changes. You can switch between desktop, tablet, and mobile views at the top to check how your form looks across different screen sizes.
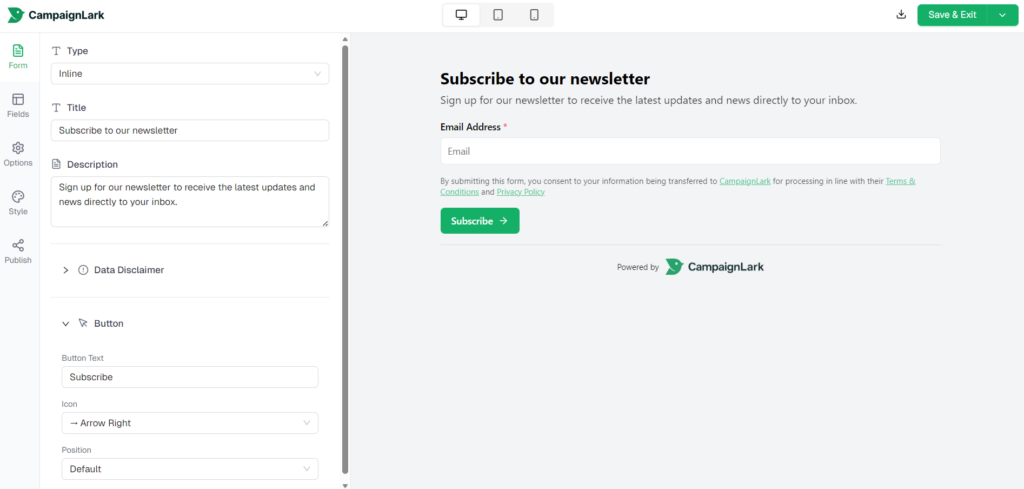
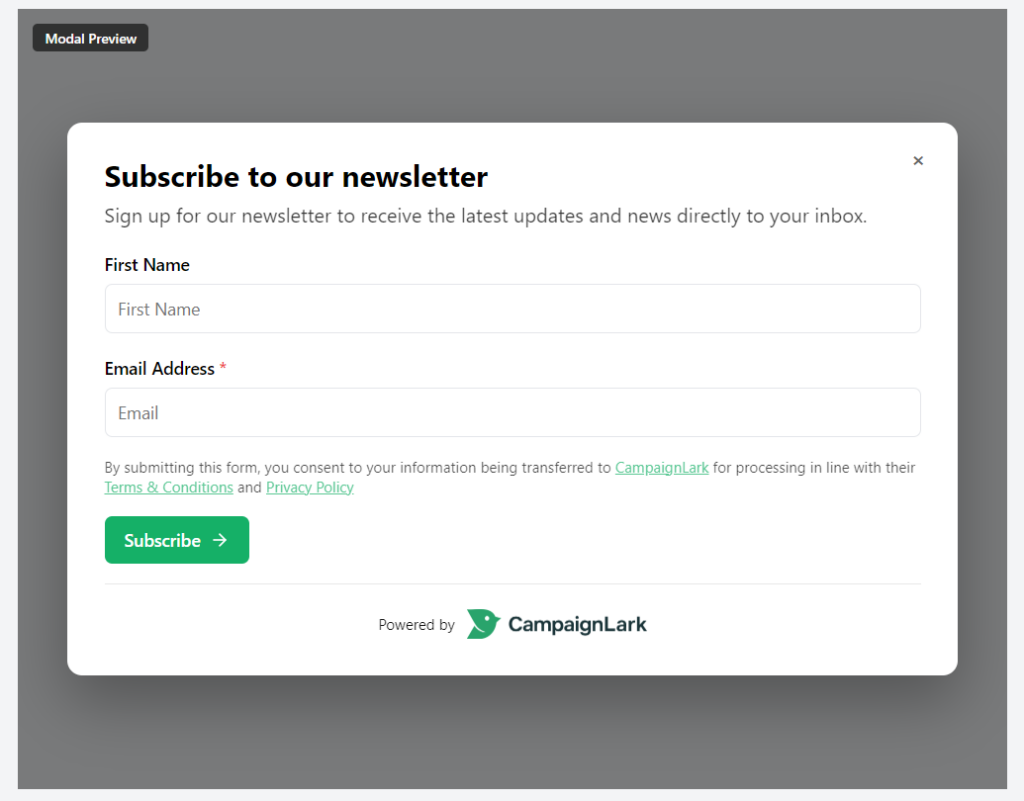
This is where you set the basic content of your form. You can set a Title, Description, and the Button label and icon. You can also choose between two form types: Inline, which embeds the form directly within your page content, and Popup, which displays it as an overlay.
The Data Disclaimer section lets you configure the consent text shown to subscribers before they submit.
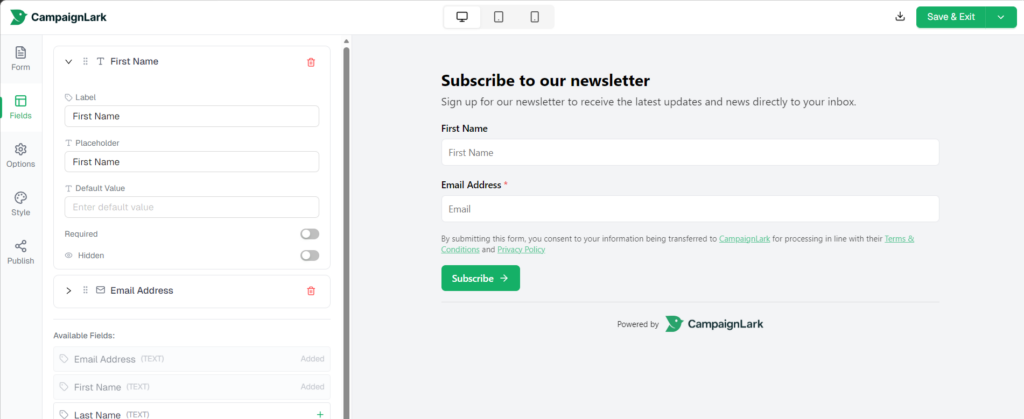
Fields Tab
Here you manage what information you collect. You can add or remove fields, drag them to reorder, and mark individual fields as required. Email Address is always included since it is needed to create a contact.
Options Tab
Options control how the form behaves on submission. You can assign Subscriber Tags to automatically tag contacts who sign up through this form, which is useful for segmenting by source or interest. You can also toggle Overwrite Contact to allow resubmissions to update an existing contact record and re-trigger the opt-in process. By default, duplicate submissions are prevented.
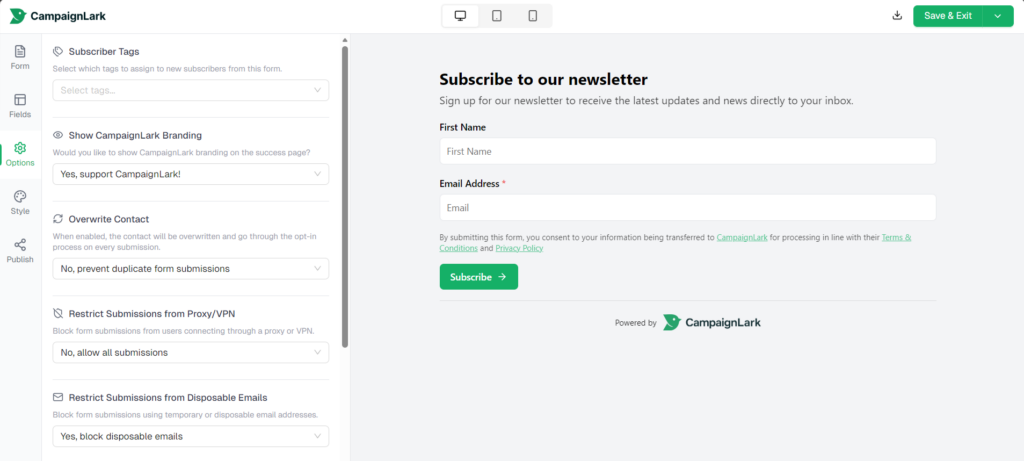
To keep your list clean, you can block submissions from Proxy/VPN connections and disposable email addresses. You can also choose between single opt-in and double opt-in. Note that direct opt-in submissions are subject to rate limits to prevent spam.
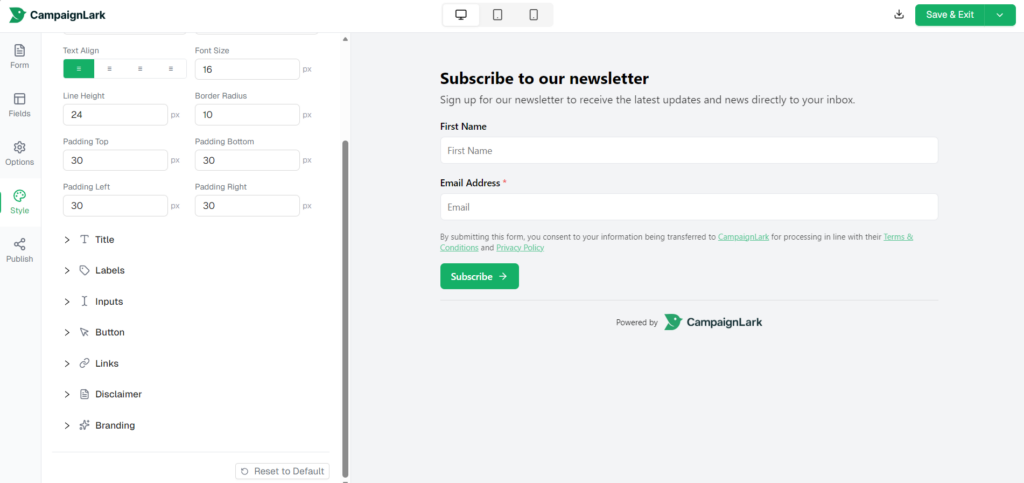
Style Tab
The Style tab gives you full control over the appearance of your form. You can adjust text alignment, font size, line height, border radius, padding, and individually style the Title, Labels, Inputs, Button, Links, Disclaimer, and Branding sections. Use Reset to Default at the bottom to revert all changes.
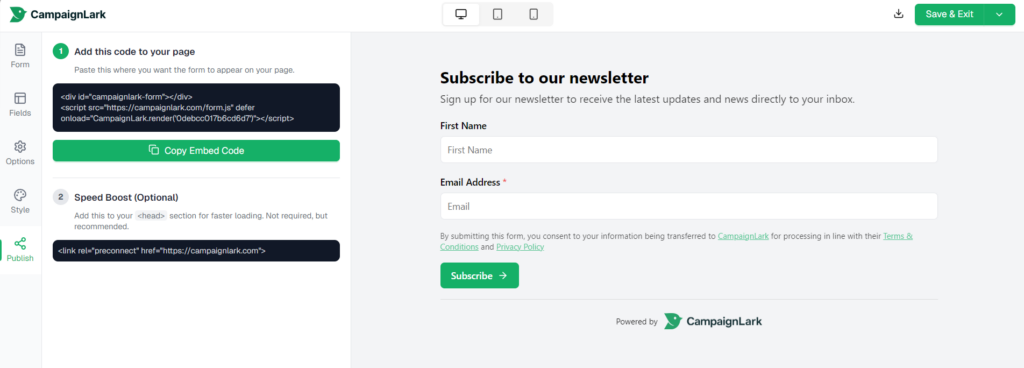
Publishing Your Form
Once your form is ready, go to the Publish tab. Copy the embed code and paste it wherever you want the form to appear on your site. There is also an optional Speed Boost snippet you can add to your site’s <head> section for faster loading. It is not required, but recommended.
Once done, click Save & Exit from the top right to save your form.
Tips
- Keep required fields to a minimum. Fewer fields generally means higher conversion.
- Use tags to track which form a subscriber came from if you have multiple forms across different pages.
- Always check the different screen size views before publishing.