
If you need to add a single contact to your workspace without going through an import, you can do it directly. This is useful when you want to quickly add someone without preparing a file or a bulk list.
Adding a Contact
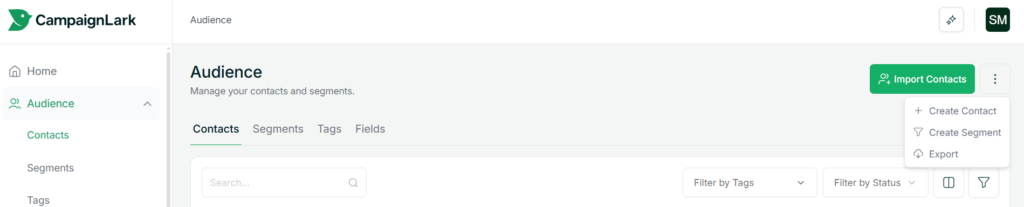
- Navigate to Audience in the left sidebar and select Contacts.
- Click the three dots icon next to the Import Contacts button in the top right.
- Select Create Contact from the dropdown.
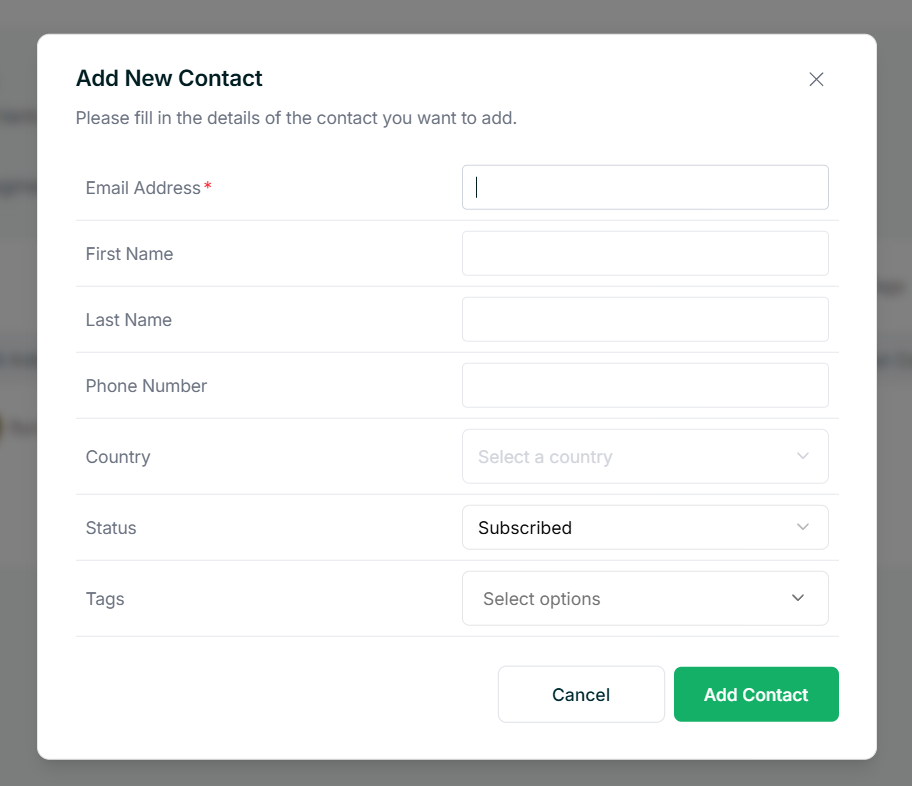
A form will appear asking you to fill in the contact’s details.
Filling in the Details
The fields shown in this form depend on what you have configured in your workspace. By default you will see Email Address, First Name, Last Name, Phone Number, and Country, but this may vary. Email Address is always required.
If you have created custom required fields in your workspace, those will need to be filled in as well before the contact can be saved.
Once you are done, click Add Contact and they will appear in your contacts list.
Tips
- Set the correct Status when adding a contact manually. Contacts added this way default to Subscribed, so make sure that reflects the actual consent you have from them.
- Assign tags at the time of creation to keep your list organised from the start.